Option 1. Copy your Google Drive files to OneDrive manually
This option involves downloading the files to your hard drive and uploading them to OneDrive.
Here's how you can do it:
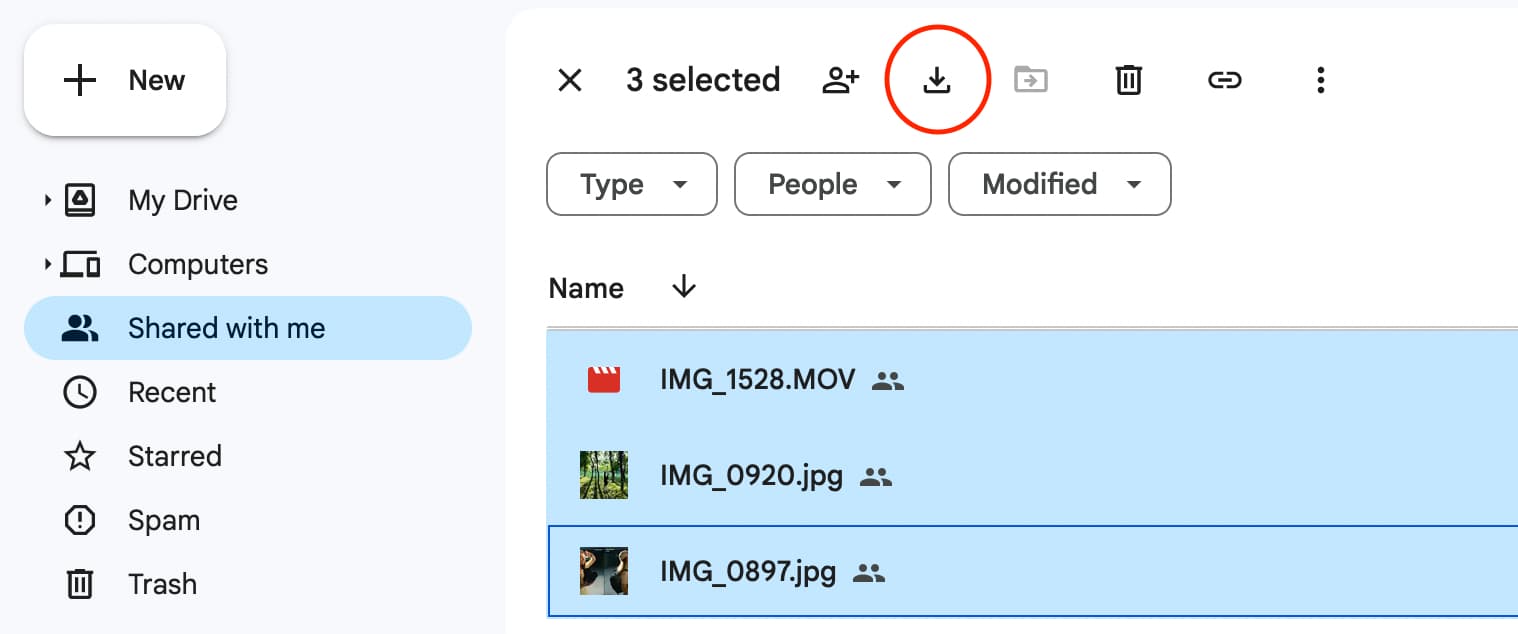
Download the files from Google Drive to your computer. You can do that either by selecting them and clicking the "Download" button or by using Google Takeout.
If you decide to use Google Takeout, please note that it will not download files and folders that are shared with you. To save the documents that other people have shared with you, select and download them manually from the "Shared with me" section of your Drive.
How to download "Shared with me" items manually
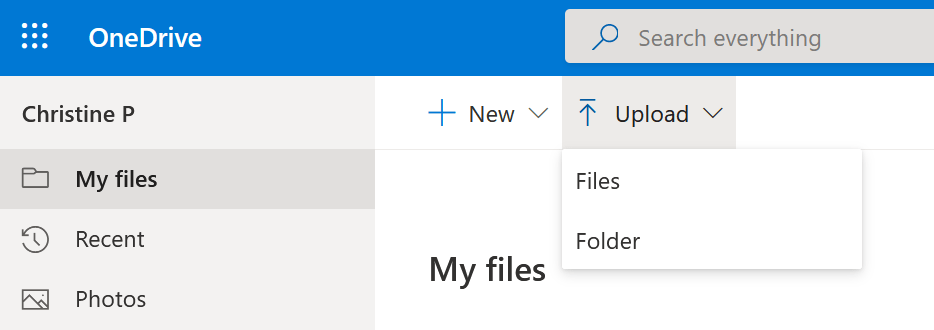
2. Upload the files to your OneDrive.
How to upload files to OneDrive
The obvious drawback of this method is that you have to handle your owned and shared files separately.
Important things that you should also take into account before you begin:
- Depending on the size of your Google Drive account, the download and upload process may take up to several days or even weeks.
- You will need to have enough storage space on your hard drive for a copy of your Google Drive account.
- Your computer will have to stay powered on during the whole download and upload process. Any interruptions to the internet connection and power supply can cause the process to fail.
- When you download multiple files (either manually or using Google Takeout), Google puts them in archives. To recreate the structure of your Google Drive in OneDrive, you will have to unzip the archives on your computer and re-organize the files before you upload them to OneDrive.
- If you have a large account (over 10 GB) and decide to use Google Takeout, your archive will be split into several parts by default. Some of them may fail to generate properly and the archive will have to be requested again.
Option 2. Export your Google Drive files to OneDrive directly using Google Takeout
Please note that this option is only available when exporting to a personal OneDrive account. Unfortunately our .syr.edu accounts are not compatible with this method.
Using this option, you will be able to put a zipped archive of your Google Drive into OneDrive automatically.
Here’s how you export Google Drive files to OneDrive:
Go to Google Takeout.
- Select "Drive" and click "Next step".
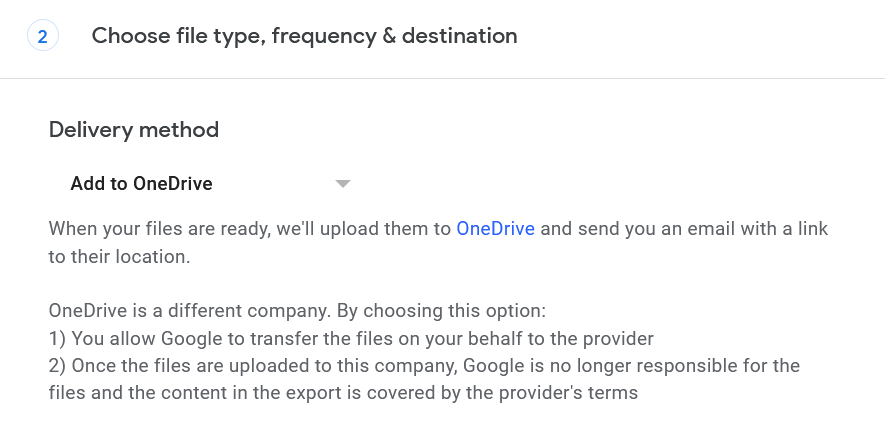
- In the "Delivery method" drop-down menu select "Add to OneDrive".
- Select the frequency ("Export once") and the export file type and size. Then click "Create export".
How to export Google Drive to OneDrive
Please consider the following when choosing this method:
- Google Takeout will not transfer the files and folders that are shared with you. To copy shared documents, select and download them manually from the "Shared with me" folder of your Drive. Then upload them to OneDrive.
- The migration process may take up to several days depending on the size of your export. Larger accounts (10+ GB) will be split into several archives by default.
- Google Takeout will export one or several archives instead of individual files and folders. To use your documents in OneDrive, you will first need to download, unzip and re-organize them.
Option 3. Third-Party Application
There are a variety of third-party applications that a user can choose to complete the migration task, a few which have been outlined below. Please keep in mind none of these options are supported by Syracuse University or the Information Technology staff.
- SysTools G Drive to OneDrive migration Tool (recommended by Microsoft)
- VaultME
- Shoviv Cloud Drive Migrator


